How to Install and Maintain Heat Pipe CPU Coolers?
The longevity and optimum performance of your computer’s central processing unit depend on heat pipe CPU coolers. While installing and maintaining these coolers is relatively simple, it is still important to follow the right procedures to guarantee your system operates to its full potential. This could be done heat sink company itself. In this article, we will provide a step-by-step tutorial for installing and maintaining heat pipe CPU coolers, along with advice on troubleshooting and enhancing their performance.
Installation Process
Step 1: Gather Your Tools
It is crucial to gather all the necessary tools before starting the installation process. Different tools will be needed depending on your purchased heat pipe CPU cooler. However, a screwdriver, thermal paste, and a cleaning cloth are needed for the majority of installations.
Step 2: Remove the Previous CPU Cooler
To start the installation process, remove the old CPU cooler from your system. This can be accomplished by carefully removing the cooler from the motherboard by unscrewing it from the CPU socket.
Step 3: Clean the CPU
After removing the old CPU cooler, it’s crucial to give the CPU’s surface a thorough cleaning. To get rid of any leftover thermal paste or debris, use a cleaning cloth and a small amount of rubbing alcohol.
Step 4: Apply Thermal Paste
It’s crucial to apply a small amount of thermal paste to the CPU’s surface before mounting the new CPU cooler. By doing this, the CPU and cooler will be able to transfer heat as efficiently as possible.
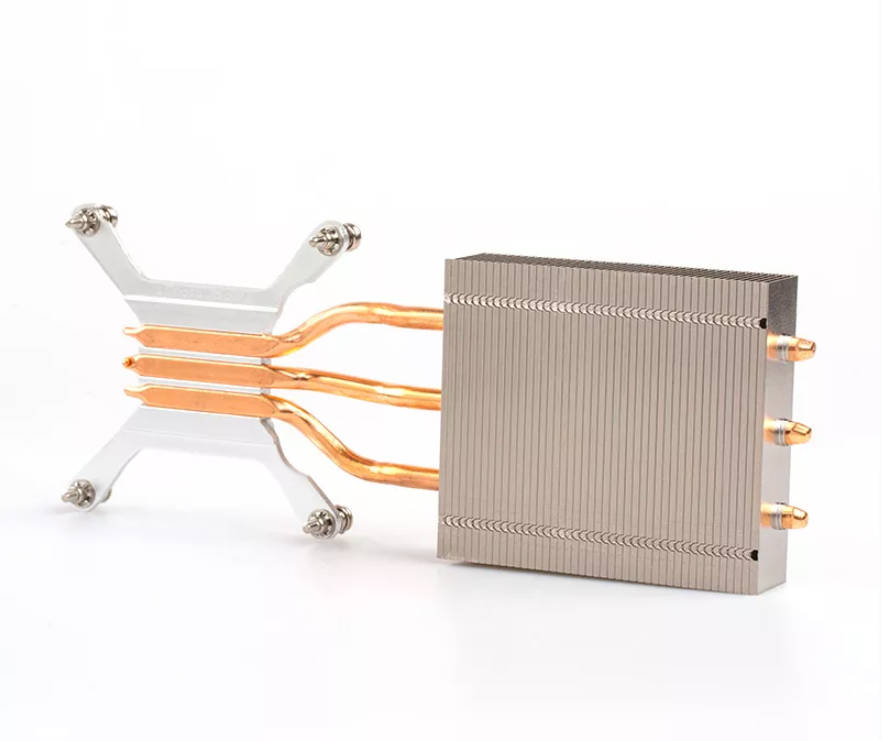
Step 5: Install the New CPU Cooler
Aligning the cooler with the CPU socket and gently pressing it down until it clicks into place will accomplish this. Screws are required to keep the cooler firmly in place.
Maintenance Procedure
Step 1: Check Up on Temperatures
It’s critical to keep an eye on temperatures after the heat pipe CPU cooler has been installed to make sure it functions properly. Software monitoring tools or in-built temperature sensors can be used for this.
Step 2: Clean the Cooler
On the surface of the CPU cooler, dust and debris can build up over time, decreasing cooling effectiveness. Cleaning the cooler on a regular basis is crucial for maintaining peak performance. To remove any debris or dust, you can use a can of compressed air.
Step 3: Replace Thermal Paste
Thermal paste that is used to transfer heat from the CPU to the cooler over time has the potential to degrade, decreasing cooling effectiveness. Periodic thermal paste replacement is crucial for maintaining peak performance.
Step 4: Troubleshooting
If you notice that your computer is running hotter than usual, the CPU cooler may not be working properly. In this situation, it’s crucial to perform a thorough investigation of the issue by looking for any loose screws, broken parts, or clogged air vents.
Step 5: Improve Performance
To ensure optimal cooling, for instance, you can modify fan speeds, or you can upgrade to a higher-performance cooler to handle applications that require more power.
Conclusion
In conclusion, heat pipe CPU coolers are crucial for preserving optimum system longevity and performance. Making sure your CPU cooler is installed and maintained correctly will guarantee its effective and efficient operation. While performance optimization can help to make sure that your system is operating at its peak, routine monitoring, cleaning, and troubleshooting can help to spot and address any potential problems. Your heat pipe CPU cooler can deliver years of dependable and effective cooling performance with the right care and maintenance.